Send Message
Home
Products
About Us
Factory Tour
Quality Control
Contact Us
Request A Quote
News
guangqing(anhui)gas technologies co.,ltd.
Home ProductsFuel System Parts

Silicone Diaphragm Model J IMPCO Repair Kits

China guangqing(anhui)gas technologies co.,ltd. certification
I'm Online Chat Now

Silicone Diaphragm Model J IMPCO Repair Kits

Silicone Diaphragm Model J  IMPCO Repair Kits

Large Image :  Silicone Diaphragm Model J IMPCO Repair Kits

Product Details:
Place of Origin: USA
Brand Name: IMPCO
Model Number: RK-COBRA
Payment & Shipping Terms:
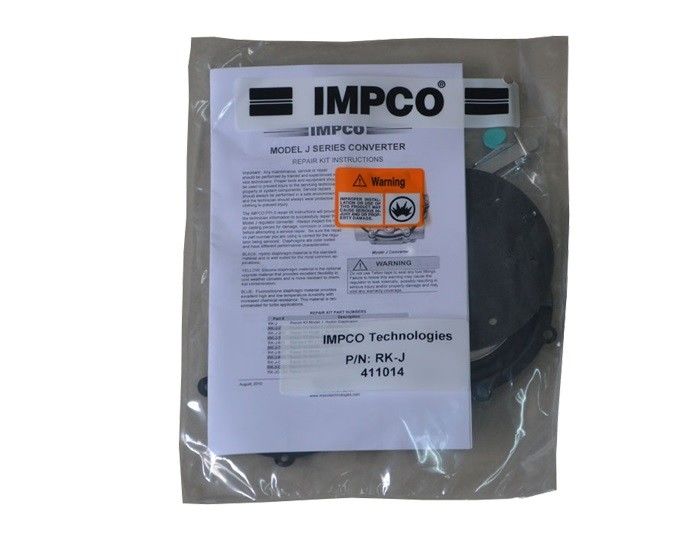
Minimum Order Quantity: 24
Price: Depending on quantity
Packaging Details: carton
Delivery Time: 8 weeks
Payment Terms: T/T
Supply Ability: 1200pcs per 8weeks
Detailed Product Description
Product Name: Repair Kit Part Number: RK-J-2
Brand: IMPCO Diaphragm: Silicone (Yellow)
High Light:

Silicone Diaphragm IMPCO Repair Kits

,

Model J IMPCO Repair Kits

IMPCO RK-J-2 , Model J Converter Repair Kit , Yellow Coded Diapragm
 
The IMPCO RK-J-2 repair kit will provide
the technician information to successfully repair the
Model J converter. Always inspect the major casting pieces for damage, corrosion or cracks before attempting a service repair. Be sure the repair kit part number you are using is correct for the regulator being serviced. Diaphragms is yellow - silicone diaphragm material is the optional upgrade material that provides excellent flexibility in cold weather climates and is more resistant to chemical contamination.
 
 
Silicone Diaphragm Model J  IMPCO Repair Kits 0
 
REBUILD INSTRUCTIONS
Silicone Diaphragm Model J  IMPCO Repair Kits 1
1. Under normal conditions, installation of a complete Model J Repair Kit should be necessary only at the time of a major engine overhaul or when the converter has been out of service for an extended period of time. Each kit includes the necessary gaskets, diaphragms, seals and some replacement screws.
Silicone Diaphragm Model J  IMPCO Repair Kits 2
 
2. Remove the 6 screws (2) from the secondary cover assembly (3).
NOTE: Identify type and location of screws removed (i.e. Torx) to ensure the same type and size screws are returned to the correct locations during reassembly.
Silicone Diaphragm Model J  IMPCO Repair Kits 3
3. Loosen the secondary cover (3) by tapping around the circumference with a plastic screw driver handle.
 
Silicone Diaphragm Model J  IMPCO Repair Kits 4
4. Remove the secondary cover (3) and secondary dia-phragm (4) as a unit. Note the secondary lever (6) pro-truding through the metal tab slot of the secondary dia-phragm. Slide the cover and diaphragm toward the gas inlet to free the lever from the slotted tab of the dia-phragm. Take care not to bend the lever.
Silicone Diaphragm Model J  IMPCO Repair Kits 5
5. Remove the screw (5) retaining the secondary lever fulcrum pin.
 
Silicone Diaphragm Model J  IMPCO Repair Kits 6
6. Remove the secondary lever (6) and fulcrum pin (7). Set aside fulcrum pin for reassembly. Remove the secondary spring (9).
Silicone Diaphragm Model J  IMPCO Repair Kits 7
7. Turn the converter over. Remove the seven screws (20) and lift off the primary cover (19).
 
Silicone Diaphragm Model J  IMPCO Repair Kits 8
8. Remove the primary diaphragm (18).
Silicone Diaphragm Model J  IMPCO Repair Kits 9
9. Remove the primary valve pin (17) and spring (16).
 
Silicone Diaphragm Model J  IMPCO Repair Kits 10
10. Remove plate (14) and the gasket (13).
Silicone Diaphragm Model J  IMPCO Repair Kits 11
11. Remove the gasket (13) from the plate (14). Clean plate as needed to ensure a good seal with a new gas-ket.
Silicone Diaphragm Model J  IMPCO Repair Kits 12
12. Remove the primary seat (12). Clean covers (3, 14, & 19), body (10) and all other metal parts as necessary with a safety solvent as needed and allow to dry prior to reassembly. Do not use harsh solvents such as brake or carburetor cleaner on any of the non-metallic components as they will damage the material.
Silicone Diaphragm Model J  IMPCO Repair Kits 13
13. Install new primary seat (12).
 
Silicone Diaphragm Model J  IMPCO Repair Kits 14
14. Set new plate gasket (13) on the plate (14). The pri-mary pressure hole in the gasket must line up with the hole in the body cover plate as noted in the photo at left.
Silicone Diaphragm Model J  IMPCO Repair Kits 15
15. Place the plate (14) and gasket (13) on to the body (10) and align the screw holes.
Silicone Diaphragm Model J  IMPCO Repair Kits 16
16. Insert the new primary valve pin (17) through the spring (16) and insert into the plate (14) with the larger diame-ter end of the spring resting against the plate.
Silicone Diaphragm Model J  IMPCO Repair Kits 17
17. Set the primary diaphragm (18) in place on the plate (14). Line up the screw holes to the plate.
 
Silicone Diaphragm Model J  IMPCO Repair Kits 18
18. Carefully place the primary cover (19) over the dia-phragm (18). Hand-thread the screws (20) through the cover and plate (14) into the converter body (10).
 
Silicone Diaphragm Model J  IMPCO Repair Kits 19
19. Tighten the screws (20) to 37-43 in-lb. (4.2-4.9 N•m) in a criss-cross pattern.
 
Silicone Diaphragm Model J  IMPCO Repair Kits 20
20. Assemble the new secondary seat (8) and new sec-ondary lever (6) by inserting the seat retaining tip to the end opening of the lever as shown. Be sure the new seat properly locks into place.
 
Silicone Diaphragm Model J  IMPCO Repair Kits 21
21. Position the secondary spring (9) in place on the body (10). Place the secondary lever assembly (6 & 8) into place over the spring (9).
Silicone Diaphragm Model J  IMPCO Repair Kits 22
22. Hold the lever assembly (6 & 8) with the fulcrum pin (7) in place in its locating groove and fasten in place with the retaining screw (5).
Silicone Diaphragm Model J  IMPCO Repair Kits 23
23. Tighten the screw (5) to 29-35 in.lbs. (3.3-4.0 N•m).
 
Silicone Diaphragm Model J  IMPCO Repair Kits 24
24. The end of the secondary lever (6) should be 1/32" be-low the level of the body casting (10). Use a straight edge to measure. Remove and gently bend the lever if necessary to obtain the correct height.
 
NOTE: Bending the lever while installed may result in damage to the seat (8). Remove the lever from the body, bend, reinstall, and then re-check the height.
Silicone Diaphragm Model J  IMPCO Repair Kits 25
25. Align the secondary diaphragm (4) to the secondary lever (6) as shown. The end of the lever must protrude through the tab slot on the bottom of the new dia-phragm (4) after installation. The gap from which the link is punched should be located toward the gas inlet.
 
Silicone Diaphragm Model J  IMPCO Repair Kits 26
26. Install the secondary cover (3) with the six screws (2).
 
Silicone Diaphragm Model J  IMPCO Repair Kits 27
27. Tighten the screws (2) in a crisscross pattern to 29-35 in-lb. (3.3-4.0 N•m), to complete the installation of the repair kit components.
 
Silicone Diaphragm Model J  IMPCO Repair Kits 28
28. Attach a 100 psi air pressure hose to the regulator "IN-LET" fitting.
Silicone Diaphragm Model J  IMPCO Repair Kits 29
29. For models with a primer button: Depress the primer button several times. Air flow should be detected when the primer is depressed.
NOTE: Not all models include a primer button. Skip this step for models without a primer button.
 
Silicone Diaphragm Model J  IMPCO Repair Kits 30
30. Check the primary cover for leaks using liquid leak de-tector solution.
 
Silicone Diaphragm Model J  IMPCO Repair Kits 31
31. Make sure one of the regulator's secondary outlets is plugged. Draw a bubble of leak solution over the other regulator outlet. The bubble should hold for several se-conds when the regulator is pressurized. If any leaks are found, the regulator must be replaced. If no leaks are found, the regulator can be reinstalled and returned to service.
Silicone Diaphragm Model J  IMPCO Repair Kits 32
 

Contact Details
guangqing(anhui)gas technologies co.,ltd.

Contact Person: Mrs. Carrie Liu

Tel: +86 13855195806

Fax: 86-551-63664756

Send your inquiry directly to us (0 / 3000)